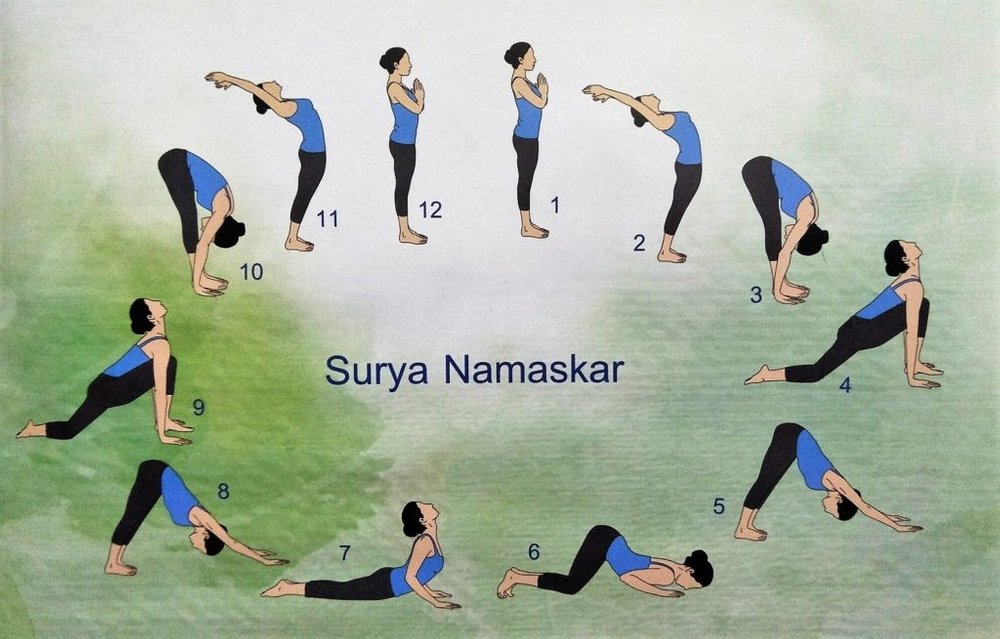
How to Do Surya Namaskar: Step-by-Step Guide for Beginners
Surya Namaskar is a yoga sequence consisting of 12 postures performed in a specific sequence to energize the body and mind. The practice is also known as Sun Salutation because it is traditionally performed facing the rising sun. Each posture of Surya Namaskar has a specific breathing pattern and movement, which helps to stretch and strengthen different muscles, joints, and organs in the body. Having said that, Surya Namaskar is a great way to warm up before a yoga practice or as a standalone exercise routine. It’s also a popular practice among yogis to start their day with a mindful movement and breathing practice. In addition to this, regular practice of Surya Namaskar can improve flexibility, balance, stamina, and overall health and well-being.
It is a traditional yoga practice that has been practiced for centuries and is believed to have many physical and mental health benefits.
This yoga practice is suitable for people of all ages and fitness levels and can be easily modified to meet individual needs. However, regular practice of Surya Namaskar can help improve physical strength, reduce stress and anxiety, and promote inner peace and harmony. I personally came across its benefits when I recovered from COVID-19 in 2021. I was definitely not in a position to perform heavy workouts anymore so thought to start with yoga. Thereafter, I started to follow a yoga routine where Surya namaskar was an integral part. I must say the regular practice greatly helped to improve my stamina in couple of weeks.
Let’s deep dive into the different forms and how to perform.
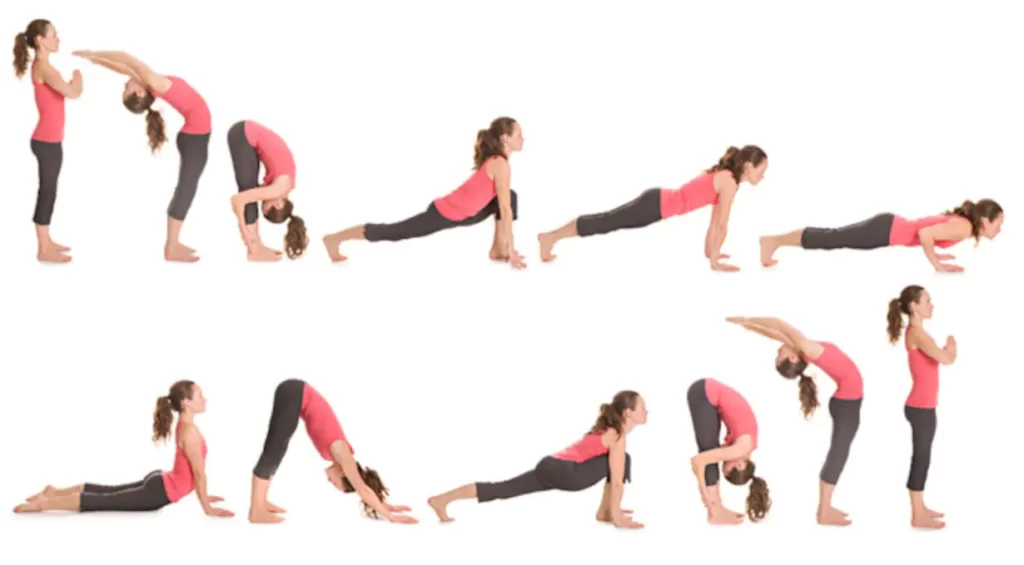
1. Pranamasana (Prayer pose)
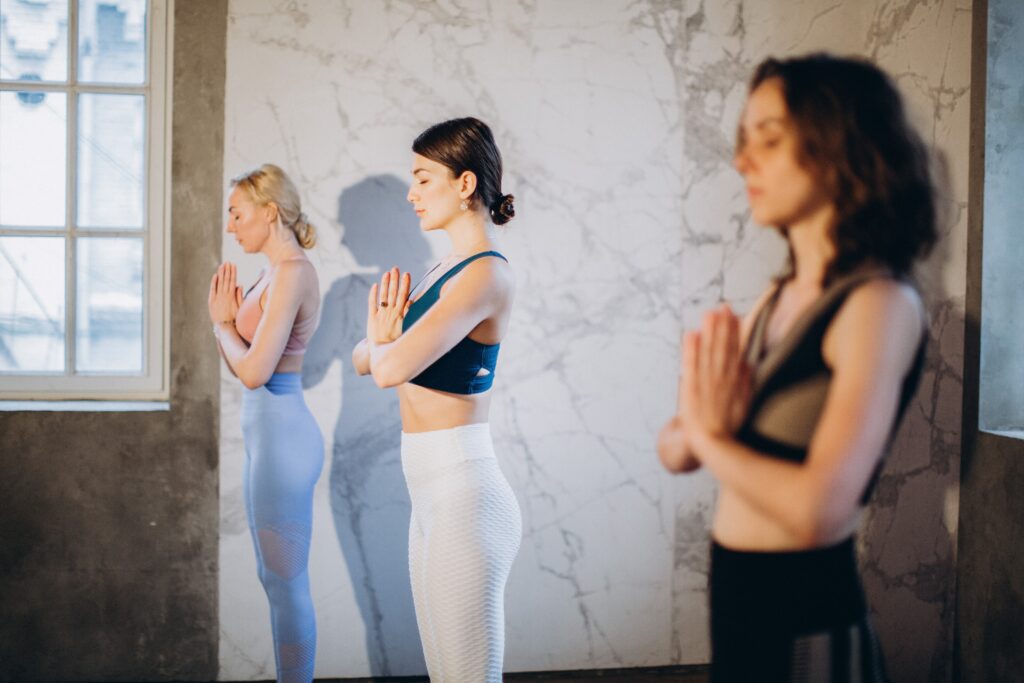
Pranamasana, also known as Prayer pose, is the first pose in the Surya Namaskar sequence. Here’s how to perform Pranamasana:
- Stand at the front of your mat with your feet together and your arms at your sides.
- Take a few deep breaths, relaxing your body and mind.
- Bring your hands together in front of your chest in a prayer position, with your palms touching and your fingers pointing upward.
- Keep your shoulders relaxed and your chest open.
- Press your palms together firmly and feel the energy flow between your hands.
- Close your eyes and focus on your breath, feeling your body and mind becoming more calmer and more centered.
- Hold the pose for a few breaths or as long as you like.
- To release the pose, gently lower your arms to your sides and take a deep breath.
- Pranamasana is often used as a starting and ending point for Surya Namaskar.
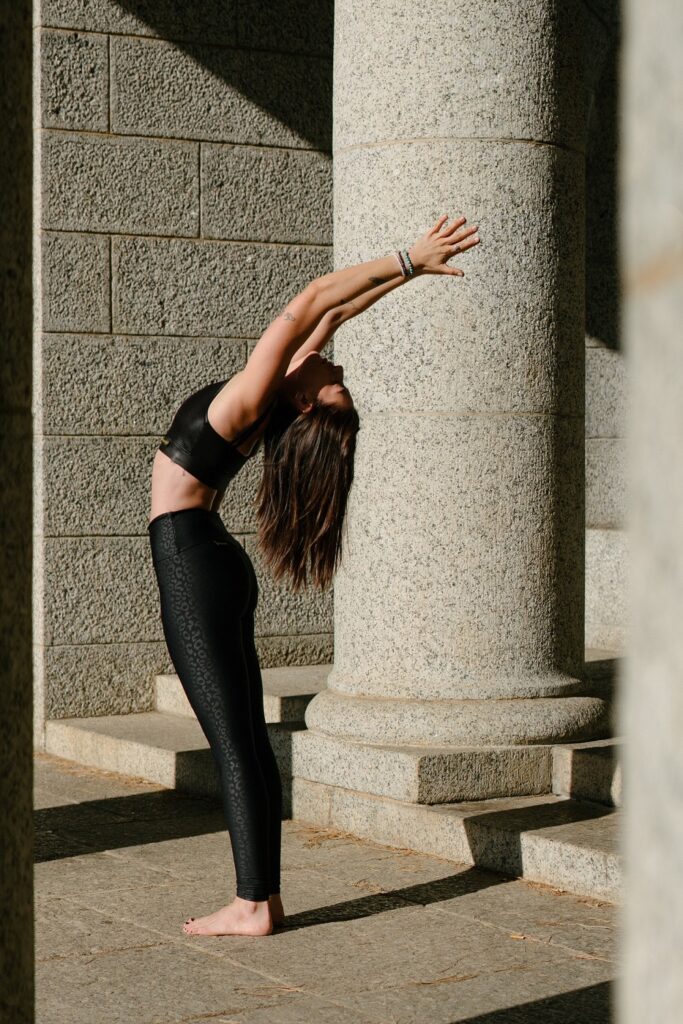
2. Hastauttanasana (Raised Arms pose)
Hastauttanasana, also known as Upward Salute or Raised Arms Pose, is a simple yoga posture that can also be done as a standalone pose. Here’s how to perform Hastauttanasana:
Begin in Tadasana (Mountain Pose) with your feet hip-distance apart, arms at your sides, and palms facing forward.
Inhale and lift your arms overhead, bringing your palms together into Namaste mudra (prayer position) or keeping them shoulder-distance apart.
Gently arch your back and gaze up toward your hands, lengthening your spine and opening your chest.
Hold the pose for a few breaths, continuing to lift through your fingertips and engage your core.
To release the pose, exhale and lower your arms back to your sides, returning to Tadasana.
Some variations of this pose may include reaching your arms up and back, interlacing your fingers behind your back, or adding a slight side bend. Hastauttanasana is a great pose to stretch and strengthen your arms, shoulders, and upper back, while also promoting focus and grounding.
3. Padahastasana (Standing Forward Bend pose)
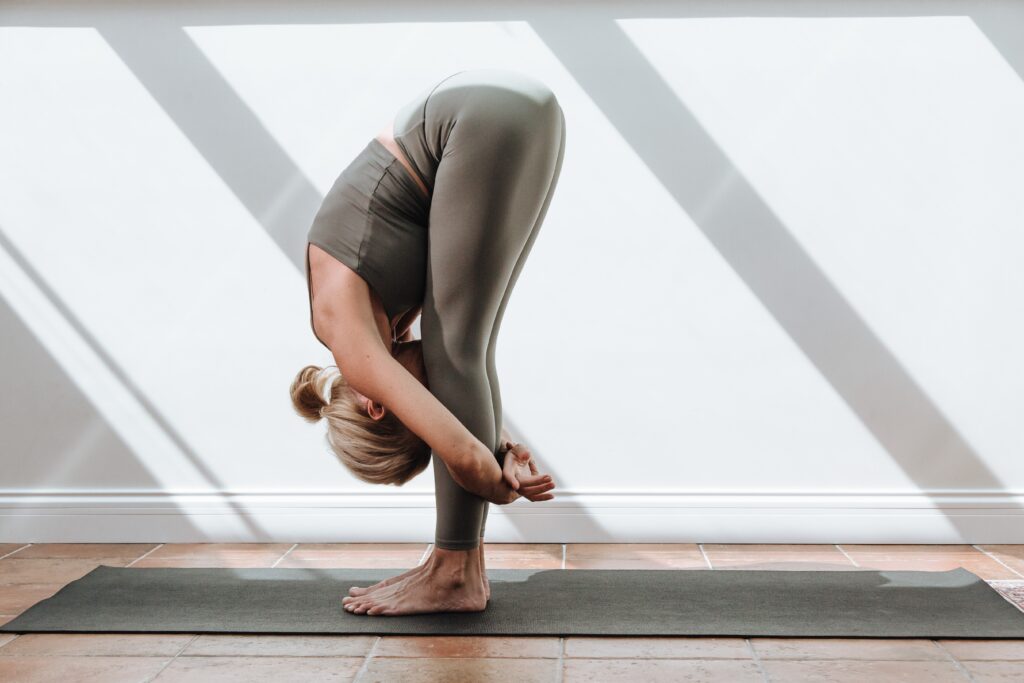
Padahastasana, also known as Standing Forward Bend or Hand-to-Foot Pose, is a yoga posture that stretches the hamstrings, calves, and lower back while also calming the mind. Here’s how to perform Padahastasana:
Begin in Tadasana (Mountain Pose) with your feet hip-distance apart, arms at your sides, and palms facing forward.
Inhale and lift your arms overhead into Urdhva Hastasana (Upward Salute), lengthening your spine and reaching through your fingertips.
Exhale and fold forward from your hips, keeping your spine long and your gaze forward. If you need to, bend your knees slightly to protect your lower back.
Bring your hands to the ground on either side of your feet. If you can’t reach the ground, you can place your hands on your shins or use blocks for support.
Inhale and lengthen your spine, bringing your chest forward and gazing ahead.
Exhale and deepen the stretch, folding further forward and relaxing your head and neck.
Hold the pose for a few breaths, continuing to breathe deeply and relax into the stretch.
To release the pose, inhale and lift your chest back up to a flat back position, gazing forward.
Exhale and release back down to Tadasana (Mountain Pose), with your arms at your sides and your palms facing forward.
Some variations of this pose may include holding onto your elbows, swaying gently from side to side, or bringing your hands to your ankles or calves. Above all, be sure to move mindfully and listen to your body, modifying the pose as needed for your level of flexibility. Padahastasana is a great pose to relieve stress and tension in the body, while also promoting relaxation and grounding.
4. Ashwa Sanchalanasana (Equestrian pose)
Ashwa Sanchalanasana, also known as Equestrian Pose or Low Lunge, is a yoga posture that stretches the hips, thighs, and groin while also strengthening the legs and core. Here’s how to perform Ashwa Sanchalanasana:
Inhale and bring your right foot forward between your hands, placing it on the ground with your knee directly over your ankle.
Lower your left knee to the ground, keeping the top of your foot flat on the ground.
Inhale and lift your chest, gazing forward and lengthening your spine.
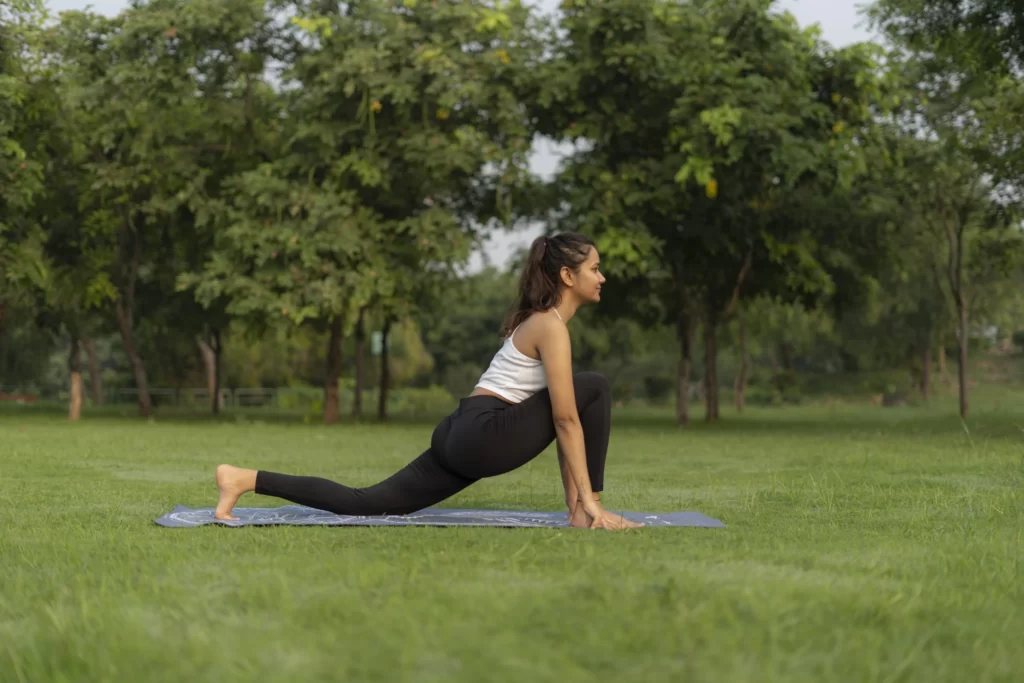
Exhale and sink deeper into the stretch, pressing your hips forward and down.
Hold the pose for a few breaths, feeling the stretch in your hips and thighs.
To release the pose, exhale and step your right foot back to Adho Mukha Svanasana.
Repeat on the other side by inhaling your left foot forward between your hands.
Some variations of this pose may include lifting your arms overhead, clasping your hands behind your back, or adding a gentle twist. Likewise, be sure to move with your breath and listen to your body, modifying the pose as needed for your level of flexibility. Ashwa Sanchalanasana is a great pose to open up the hips and stretch the legs, while also promoting focus and stability.
5. Chaturanga Dandasana (Stick pose)
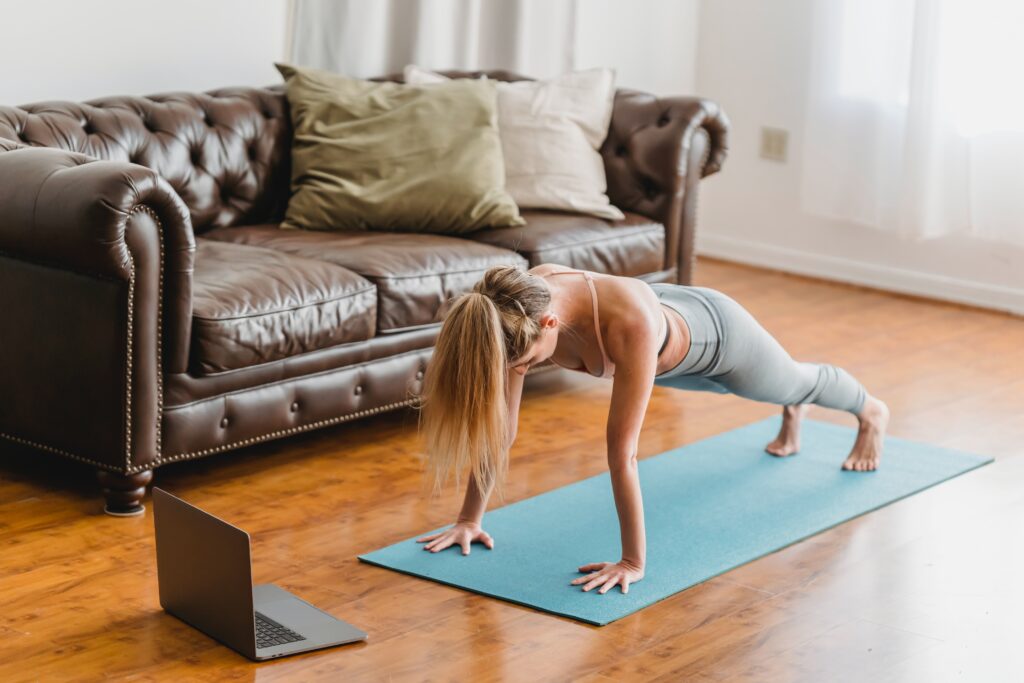
Chaturanga Dandasana, also known as Four-Limbed Staff Pose, is a challenging yoga posture that strengthens the arms, shoulders, and core muscles. Here’s how to perform Chaturanga Dandasana:
Start in Plank Pose, with your hands shoulder-distance apart and your body in a straight line from your head to your heels.
As you exhale, lower your body down towards the ground, keeping your elbows close to your sides.
Keep your body in a straight line as you lower down, engaging your core muscles to prevent your hips from dropping.
Once your upper arms are parallel to the ground, hold the pose for a few breaths, keeping your elbows bent at a 90-degree angle.
Keep your shoulders down away from your ears and your gaze forward, aligning your wrists with your elbows.
To release the pose, inhale and press up into Upward-Facing Dog Pose or Cobra Pose.
Some variations of this pose may include modifying the pose by keeping your knees on the ground or holding the pose for longer periods of time. Chaturanga Dandasana is a great pose to build upper body strength and improve posture, but it should be practiced with caution to avoid injury.
6. Ashtanga Namaskara (Salute with Eight Limbs pose)
Ashtanga Namaskara, also known as Eight-Limbed Salutation or Knees-Chest-Chin Pose, is a foundational yoga posture that strengthens the arms, shoulders, and core muscles while also stretching the back and neck. Here’s how to perform Ashtanga Namaskara:
-
Start in Plank Pose, with your hands shoulder-distance apart and your body in a straight line from your head to your heels.
-
As you exhale, lower your knees to the ground, keeping your hips lifted and your body in a straight line.
-
Slowly lower your chest and chin down to the ground, keeping your elbows close to your sides.
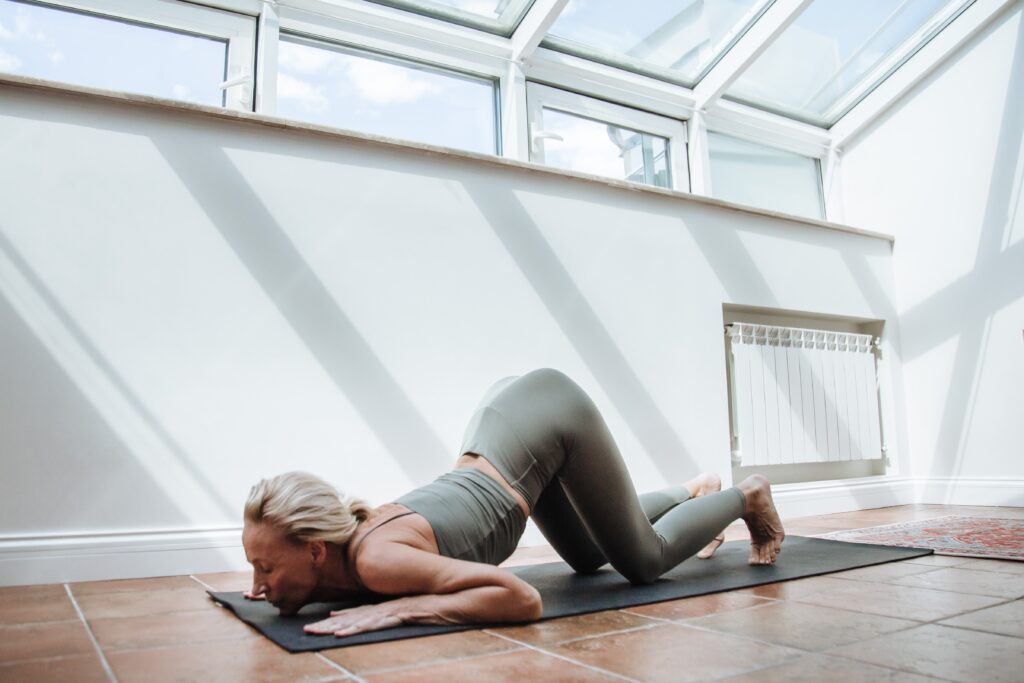
Your hands should be positioned next to your shoulders, with your fingers spread wide and your palms flat on the ground.
Hold the pose for a few breaths, pressing your palms into the ground and engaging your core muscles.
To release the pose, inhale and lift your chest and chin off the ground, coming into Bhujangasana (Cobra Pose) or Urdhva Mukha Svanasana (Upward-Facing Dog Pose).
Some variations of this pose may include holding the pose for longer periods of time, or adding a gentle twist or side stretch once you release the pose. Ashtanga Namaskara is a great pose to build upper body strength and improve posture, but it should be practiced with caution to avoid injury.
7. Bhujangasana (Cobra pose)

Bhujangasana, also known as Cobra Pose, is a gentle backbend that stretches the spine and chest while also strengthening the arms, shoulders, and core muscles. Here’s how to perform Bhujangasana:
Lie down on your stomach with your feet flat on the ground and your toes pointing away from your body.
Place your hands on the ground next to your shoulders, with your fingers pointing forward and your elbows close to your sides.
Inhale and slowly lift your chest off the ground, using your arms to support your weight.
Keep your shoulders down away from your ears and your gaze forward, lengthening your spine as you lift up.
Press the tops of your feet into the ground to engage your leg muscles and keep your hips on the ground.
Hold the pose for a few breaths, feeling the stretch in your spine and chest.
To release the pose, exhale and lower your chest back down to the ground.
In addition, some variations of this pose may include lifting your hands off the ground and interlacing your fingers behind your back or straightening your arms and lifting your hips up into Urdhva Mukha Svanasana (Upward-Facing Dog Pose). Bhujangasana is a great pose to improve posture, relieve stress, and boost energy levels.
8. Parvatasana (Mountain pose)
Parvatasana, also known as Mountain Pose or Downward-Facing Dog, is a foundational yoga posture that stretches the entire body while also strengthening the arms, shoulders, and core muscles. Here’s how to perform Parvatasana:
-
Start on your hands and knees, with your hands shoulder-distance apart and your knees hip-distance apart.
-
Spread your fingers wide and press your palms into the ground, keeping your wrists aligned with your shoulders.
-
As you exhale, lift your knees off the ground and press your hips up and back, coming into an inverted V-shape.
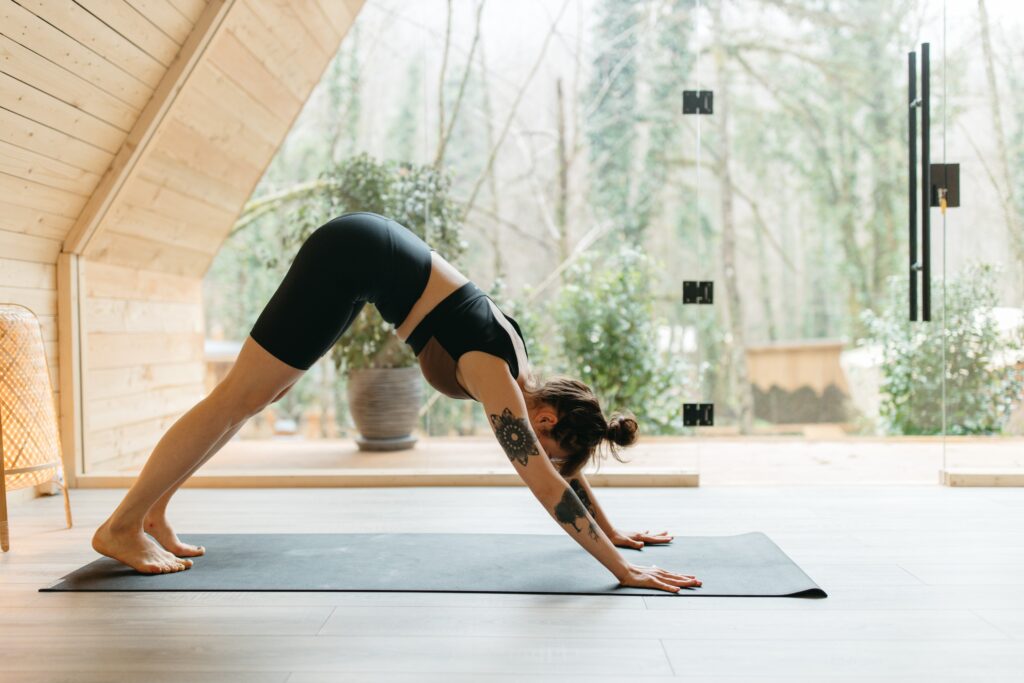
Keep your arms straight and your shoulders away from your ears, lengthening your spine and stretching the backs of your legs.
Press your heels towards the ground, but don’t worry if they don’t touch the floor.
Hold the pose for a few breaths, feeling the stretch in your spine, shoulders, and legs.
To release the pose, exhale and lower your knees back down to the ground.
Some variations of this pose may include pedaling your feet back and forth to stretch your calves and hamstrings, or shifting your weight forward into Plank Pose to build strength in your core muscles. Parvatasana is a great pose to improve posture, increase flexibility, and calm the mind.
9. Ashwa Sanchalanasana (Equestrian pose)
Returning back to Step# 4,
- Inhale and bring your left foot forward between your hands, placing it on the ground with your knee directly over your ankle.
- Lower your left knee to the ground, keeping the top of your foot flat on the ground.
- Inhale and lift your chest, gazing forward and lengthening your spine.
- Exhale and sink deeper into the stretch, pressing your hips forward and down.
- Hold the pose for a few breaths, feeling the stretch in your hips and thighs.
- To release the pose, exhale and step your right foot back to Adho Mukha Svanasana.
- Repeat on the other side by inhaling your left foot forward between your hands.
Similarly, return back to previous poses as mentioned below.
10. Padahastasana (Standing Forward Bend pose)
11. Hastauttanasana (Raised Arms pose)
12. Pranamasana or Tadasna (Prayer pose or Mountain pose)
—–To find more about Yoga and Asanas – Click Here
Pingback: Yoga Poses for Beginners: A Step-by-Step Guide - HealthNZest